You can help support this website by buying me a coffee!

How to create a Hyper-V Virtual Machine using PowerShell and install Kali Linux 2021 using text mode. Configure Kali with a static IP address, install updates and configure two-factor authentication (2FA) for SSH
1. Download Kali Linux
Download the Kali Linux 64-bit installation ISO file
https://www.kali.org/get-kali
Bare Metal
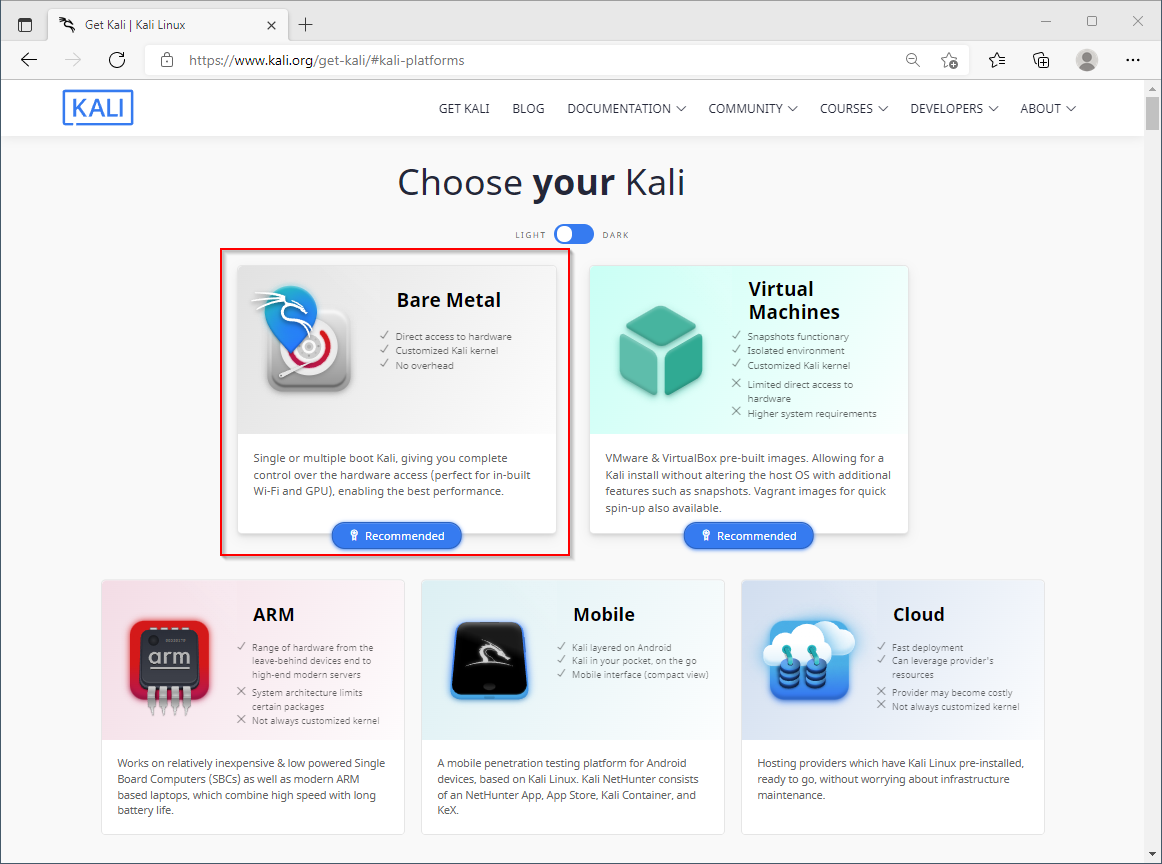
64-bit - Installer
Complete offline installation

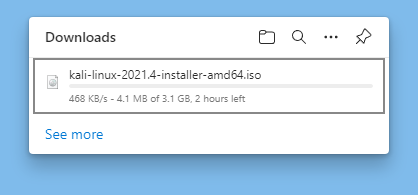
The Kali Linux complete offline installation ISO will download
kali-linux-2021.4-installer-amd64.iso
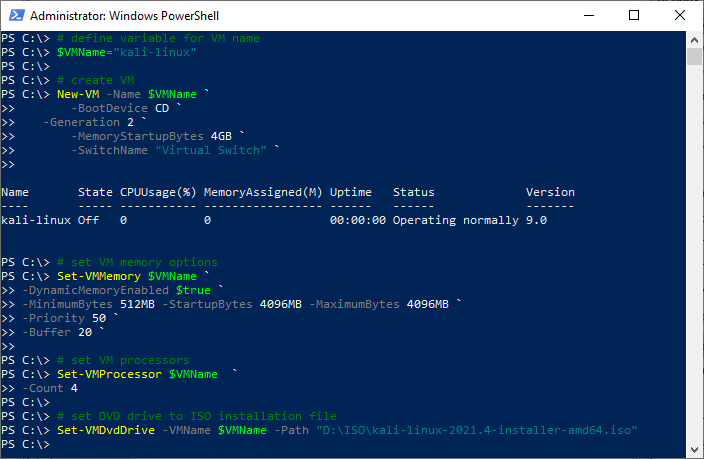
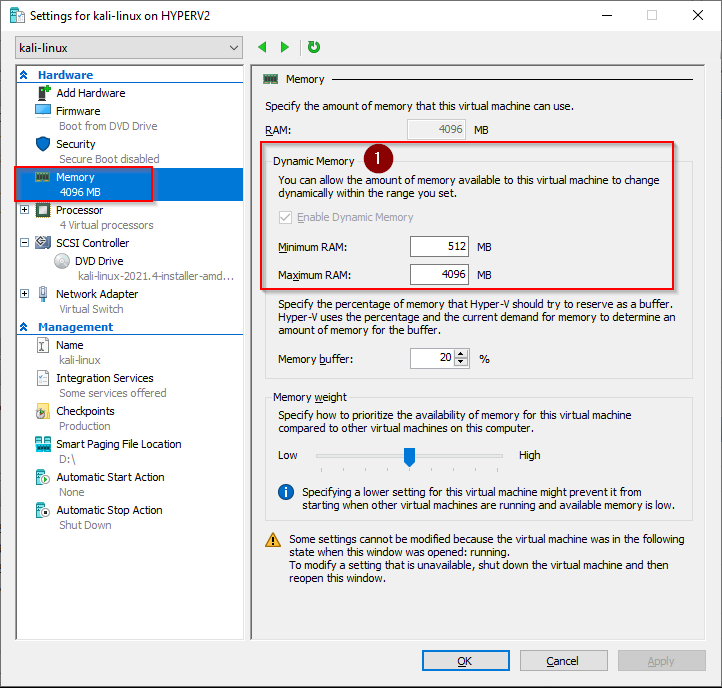
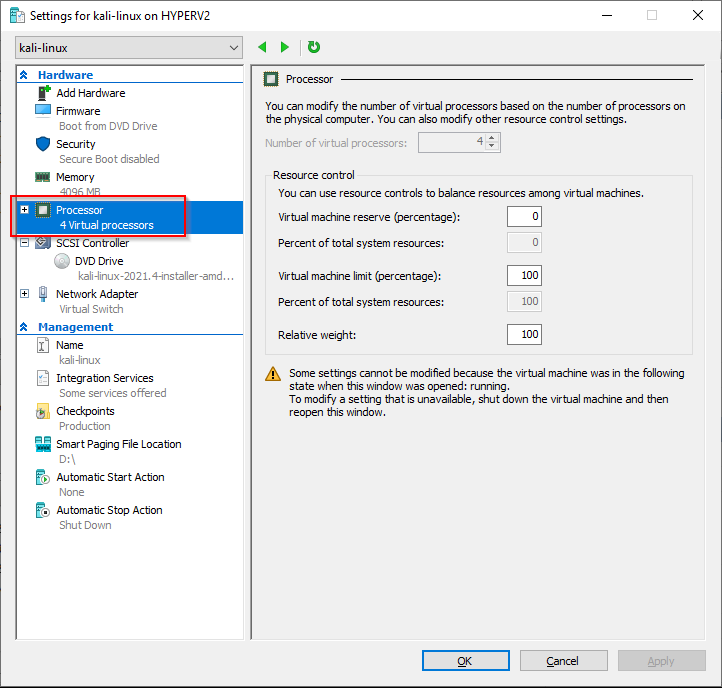
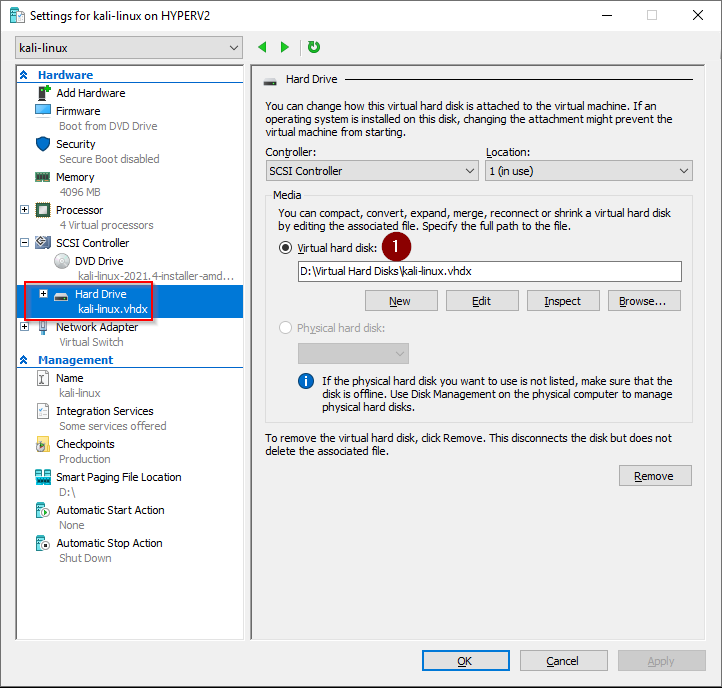
In this example, our Kali Virtual Machine has 4GB memory, 4 virtual processors, and a 60GB dynamic virtual hard disk.
We will be installing Kali Linux 2021.4 on Windows Server 2019 Hyper-V
# define variable for VM name
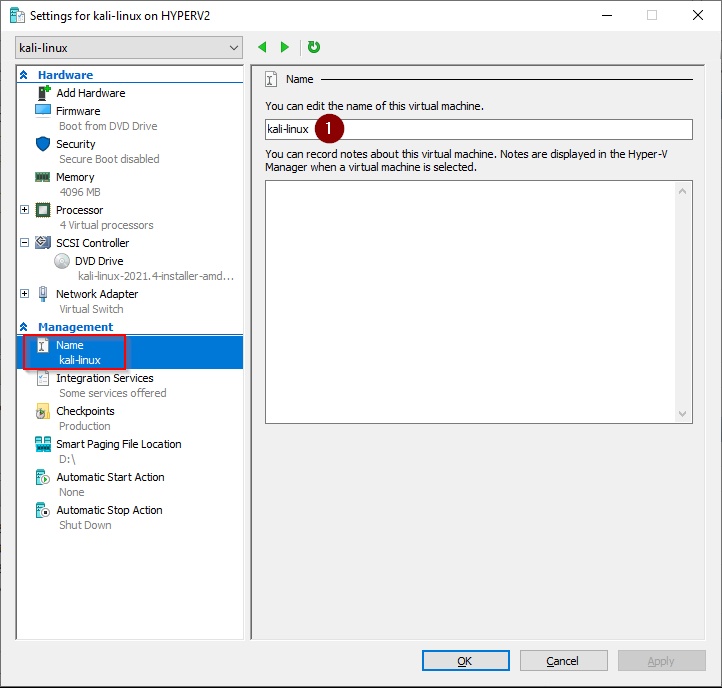
$VMName="kali-linux"
# create VM
New-VM -Name $VMName `
-BootDevice CD `
-Generation 2 `
-MemoryStartupBytes 4GB `
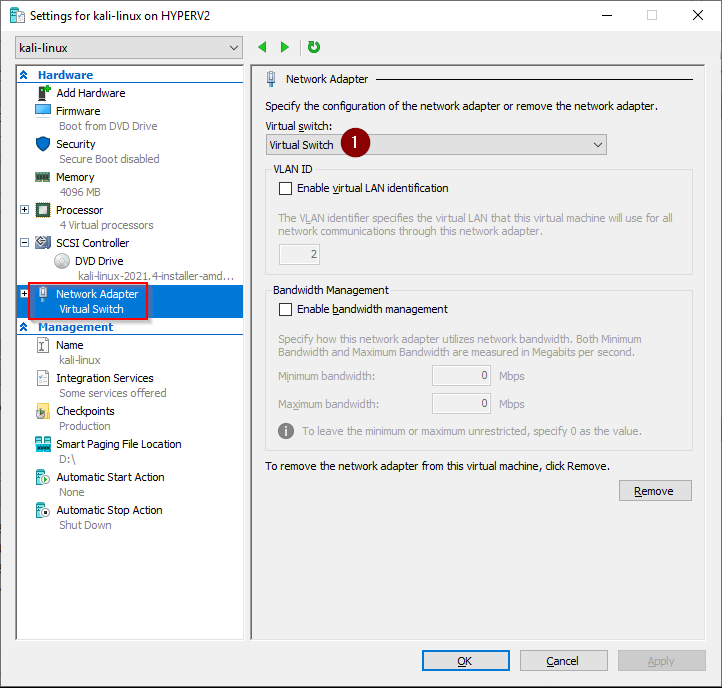
-SwitchName "Virtual Switch" `
# set VM memory options
Set-VMMemory $VMName `
-DynamicMemoryEnabled $true `
-MinimumBytes 512MB -StartupBytes 4096MB -MaximumBytes 4096MB `
-Priority 50 `
-Buffer 20 `
# set VM processors
Set-VMProcessor $VMName `
-Count 4
# set DVD drive to ISO installation file
Set-VMDvdDrive -VMName $VMName -Path "D:\ISO\kali-linux-2021.4-installer-amd64.iso"
# create virtual hard disk
New-VHD -Path "D:\Virtual Hard Disks\$VMName.vhdx" -SizeBytes 60GB -Dynamic
# attach virtual hard disk to vm
Add-VMHardDiskDrive -VMName $VMName -Path "D:\Virtual Hard Disks\$VMName.vhdx"
# turn off secure boot
Set-VMFirmware $VMName `
-EnableSecureBoot Off
# automatic start and stop settings
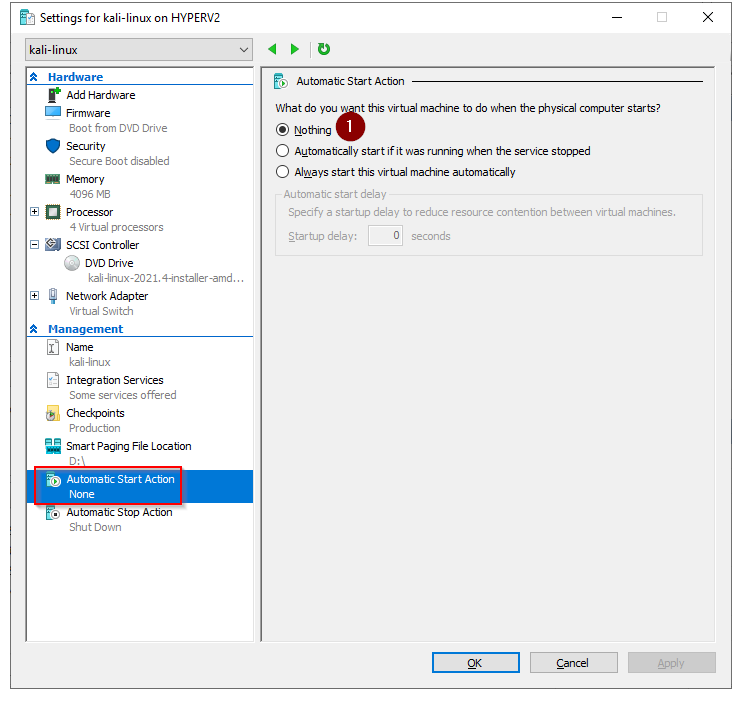
Get-VM –VMname $VMName | Set-VM –AutomaticStartAction Nothing
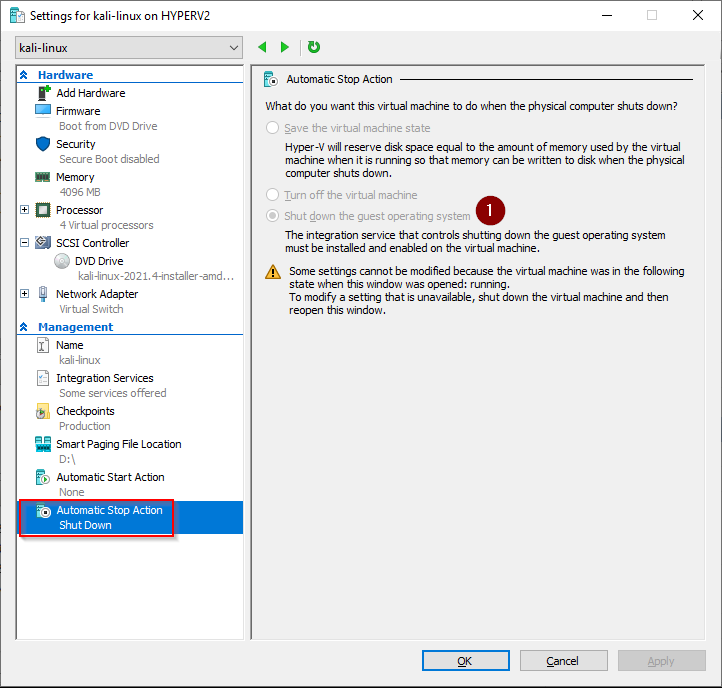
Get-VM –VMname $VMName | Set-VM –AutomaticStopAction Shutdown
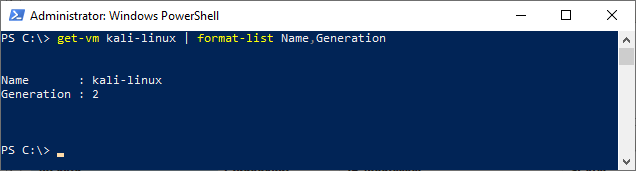
# get vm name and generation
get-vm kali-linux | format-list Name,Generation
Hyper-V New-VM
https://docs.microsoft.com/en-us/powershell/module/hyper-v/new-vmHyper-V Set-VM
by Author
https://docs.microsoft.com/en-us/powershell/module/hyper-v/set-vm
The PowerShell commands we just ran have created a VM with these settings
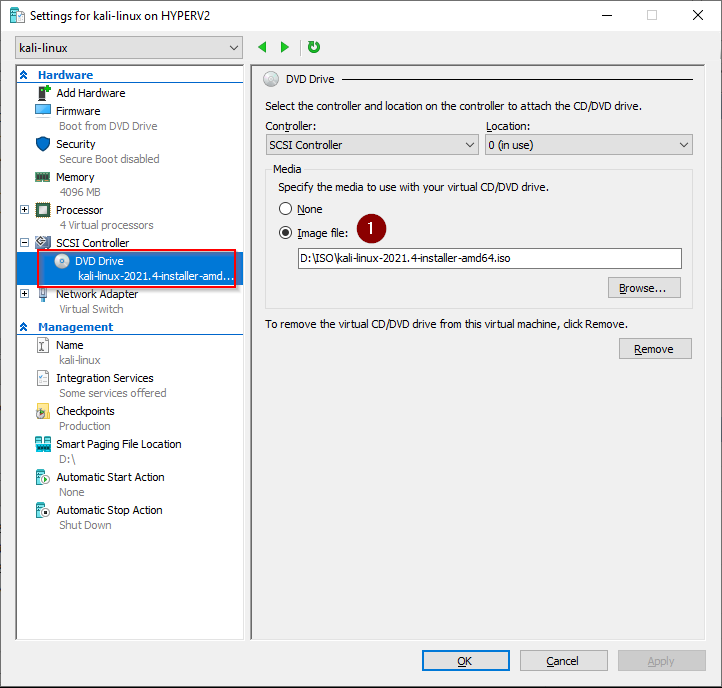
Boot from DVD drive using kali-linux-2021.4-installer-amd64.iso

Secure Boot disabled

4GB Dynamic memory
Minimum RAM 512 MB
Maximum RAM 4096 MB
4 Virtual Processors
DVD Drive - Kali Linux installation ISO
60GB dynamically expanding virtual hard disk
Virtual Switch
VM name
Automatic Start Action: Nothing
Automatic Stop Action: Shutdown
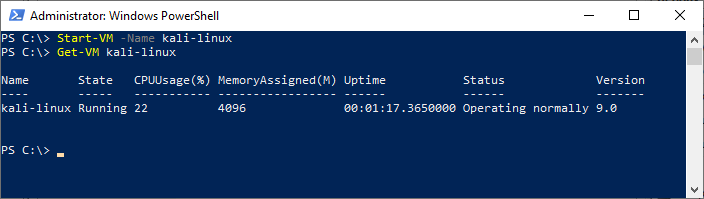
Start Virtual Machine and connect to the console
# start virtual machine
Start-VM -Name kali-linux

# get virtual machine status
Get-VM kali-linux
4. Connect to the Virtual machine console
Select VM - connect

The Kali installer will launch

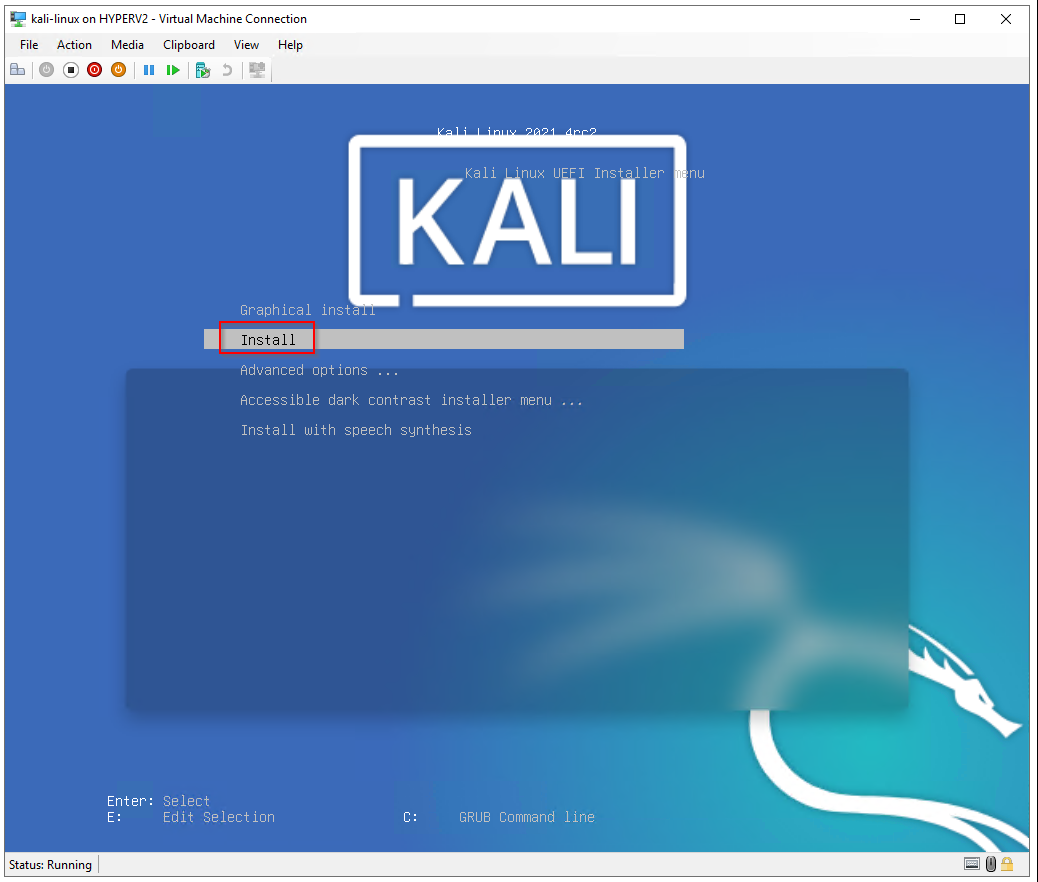
5. Install Kali Linux using text mode
The next steps go through installing Kali Linux in text mode. This creates a Kali VM with
no desktop or graphical user interface (GUI) installed.

Select Install to start the Kali installer in text mode (without a GUI)
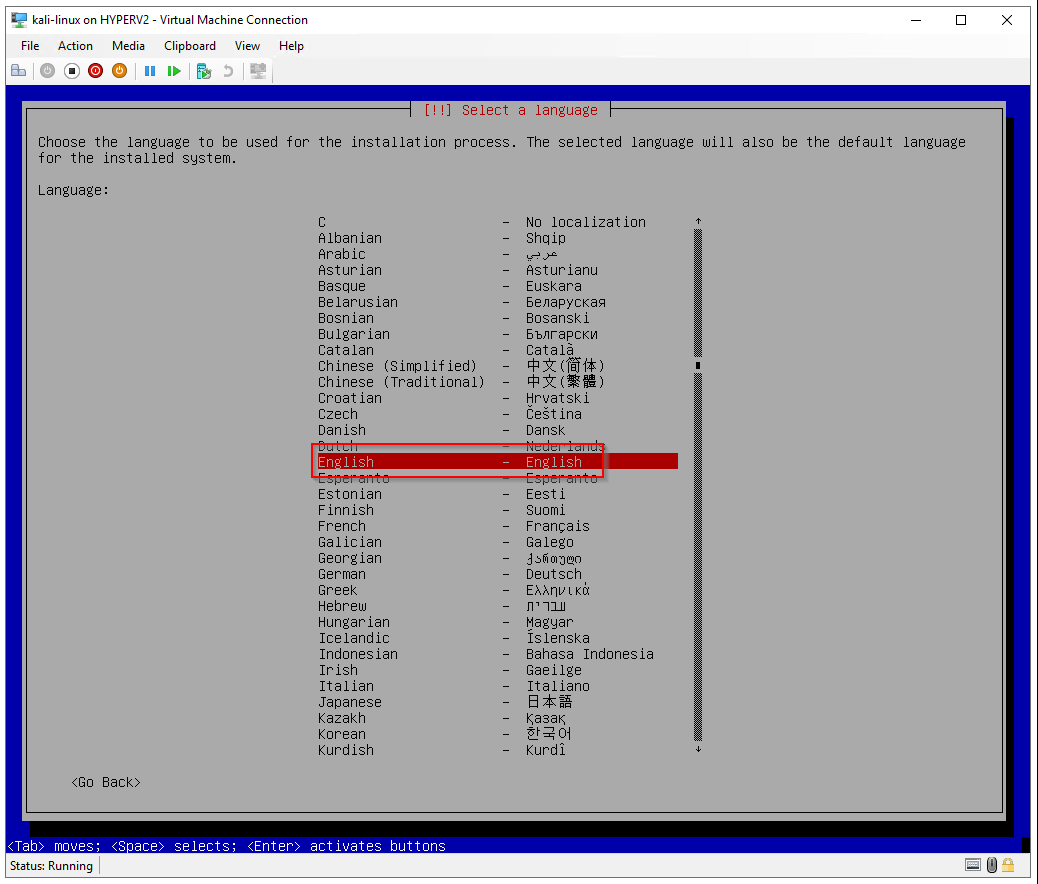
Select a language: English
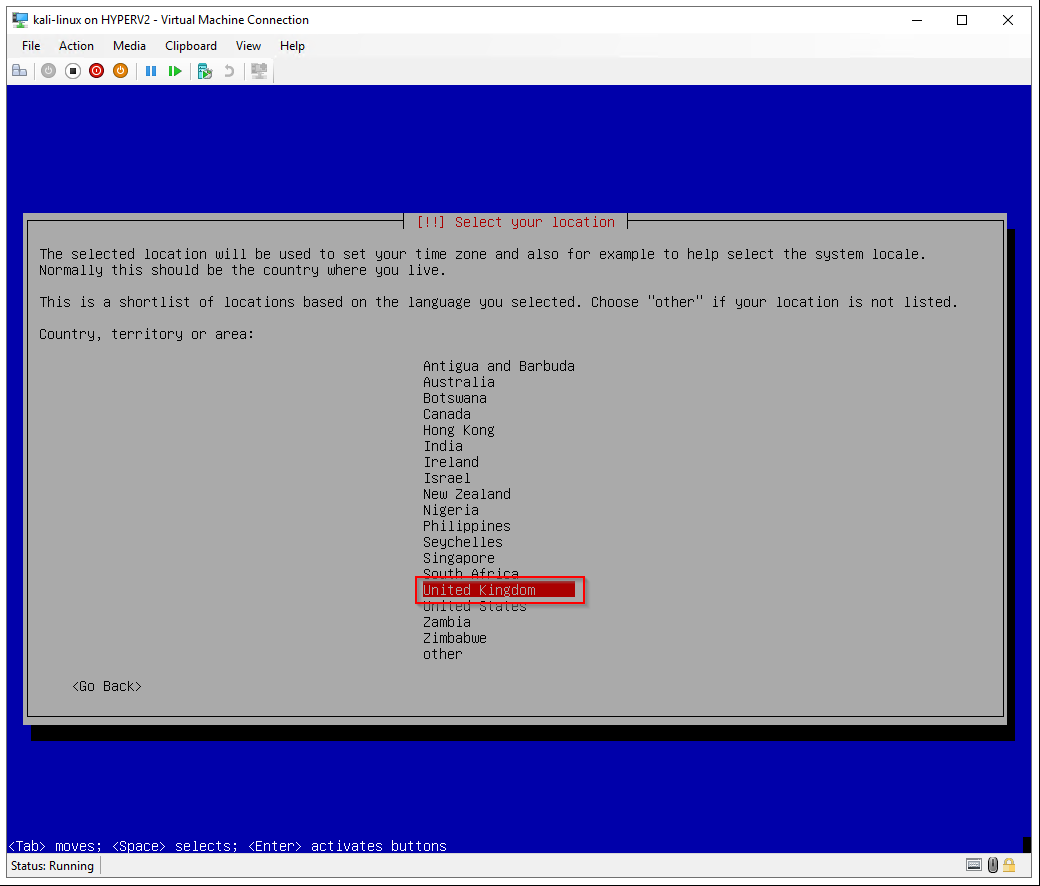
Select your location: United Kingdom
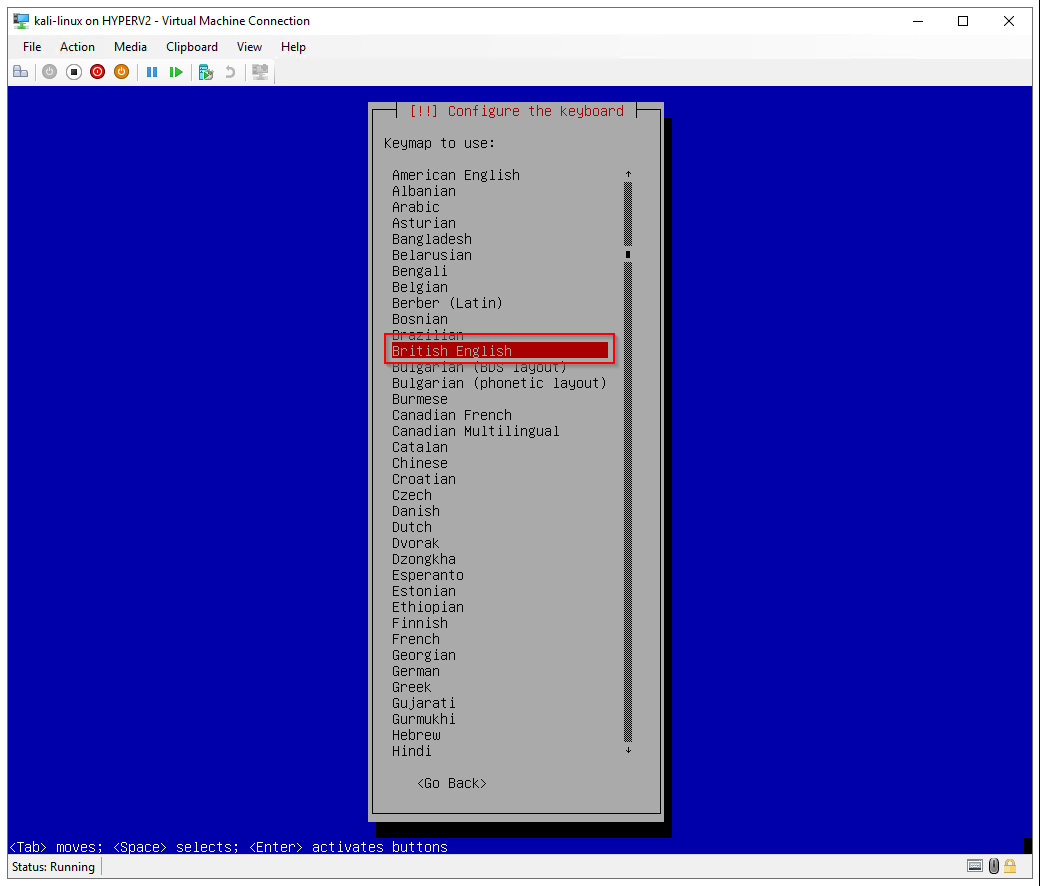
Configure the keyboard: British English
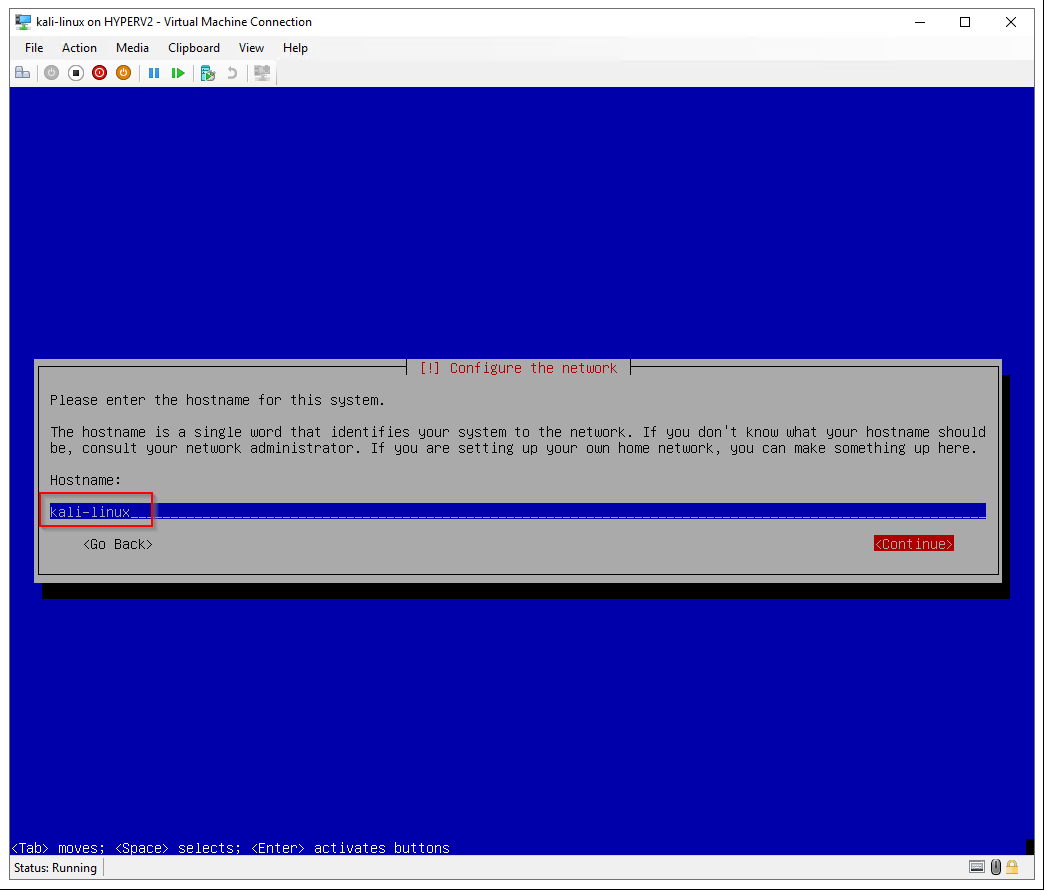
Hostname: kali-linux
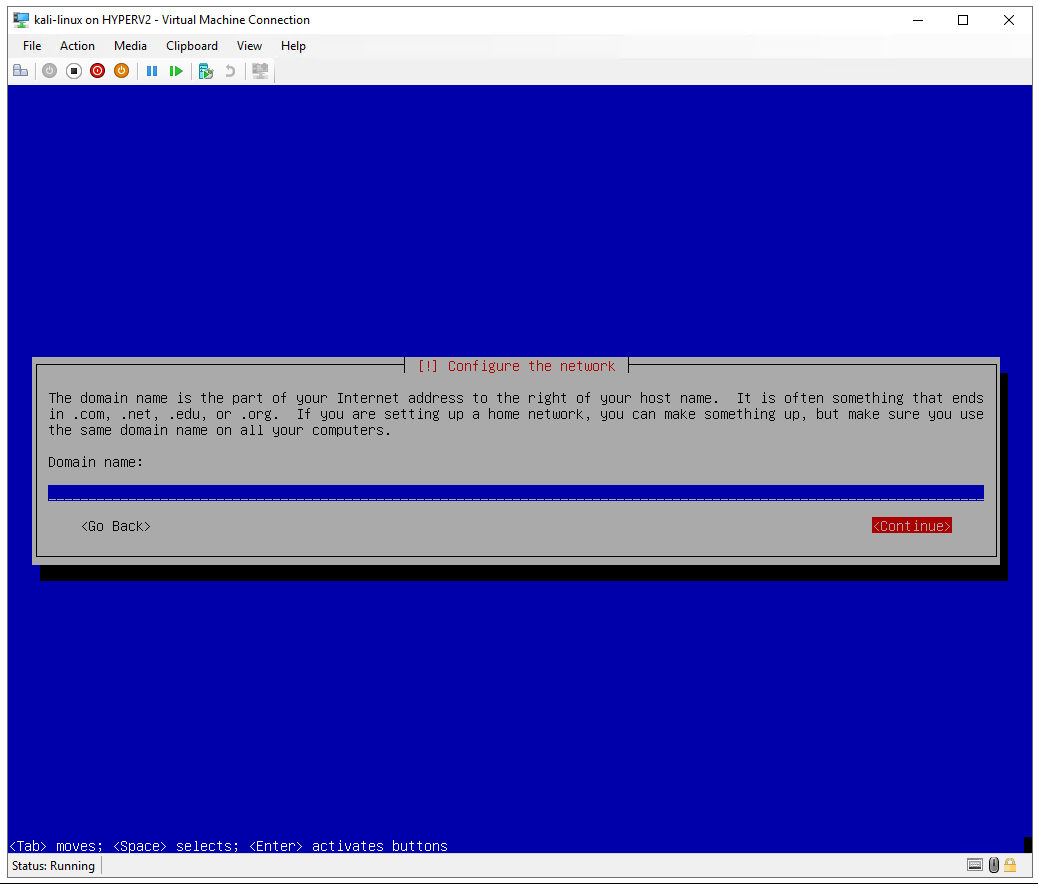
Domain name: leave blank
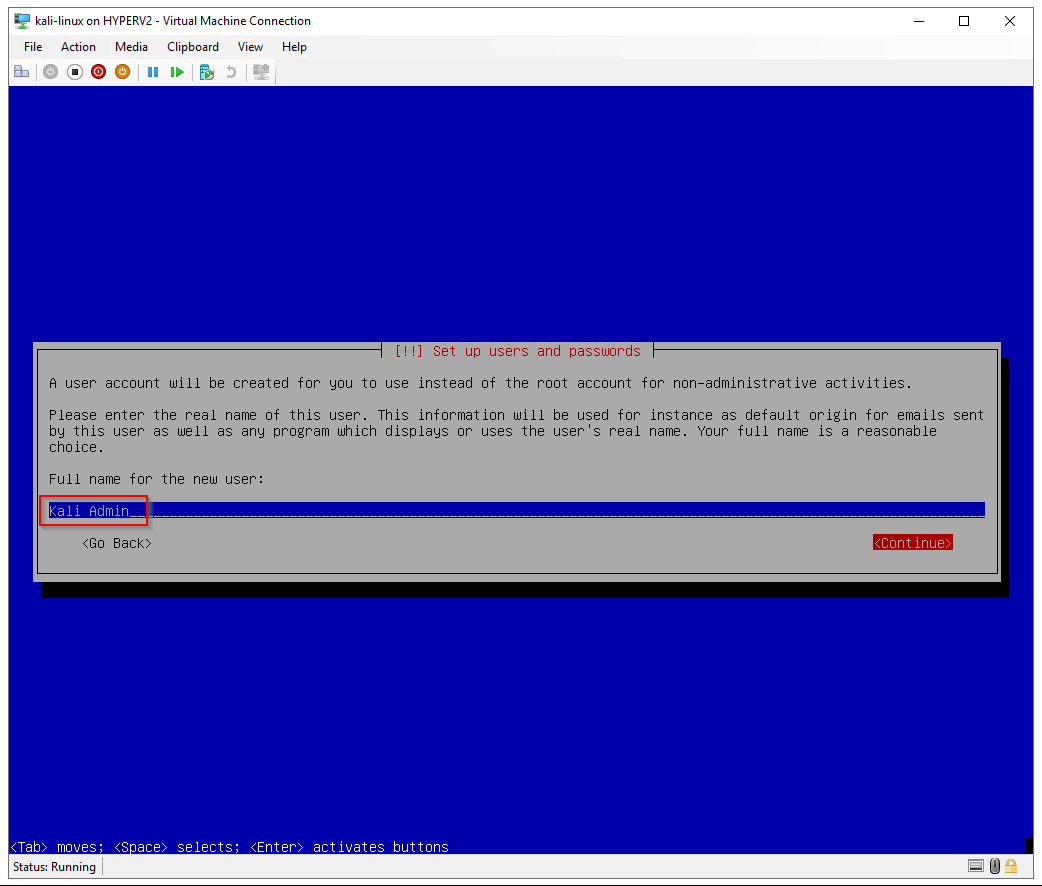
Full name for the new user: Kali Admin
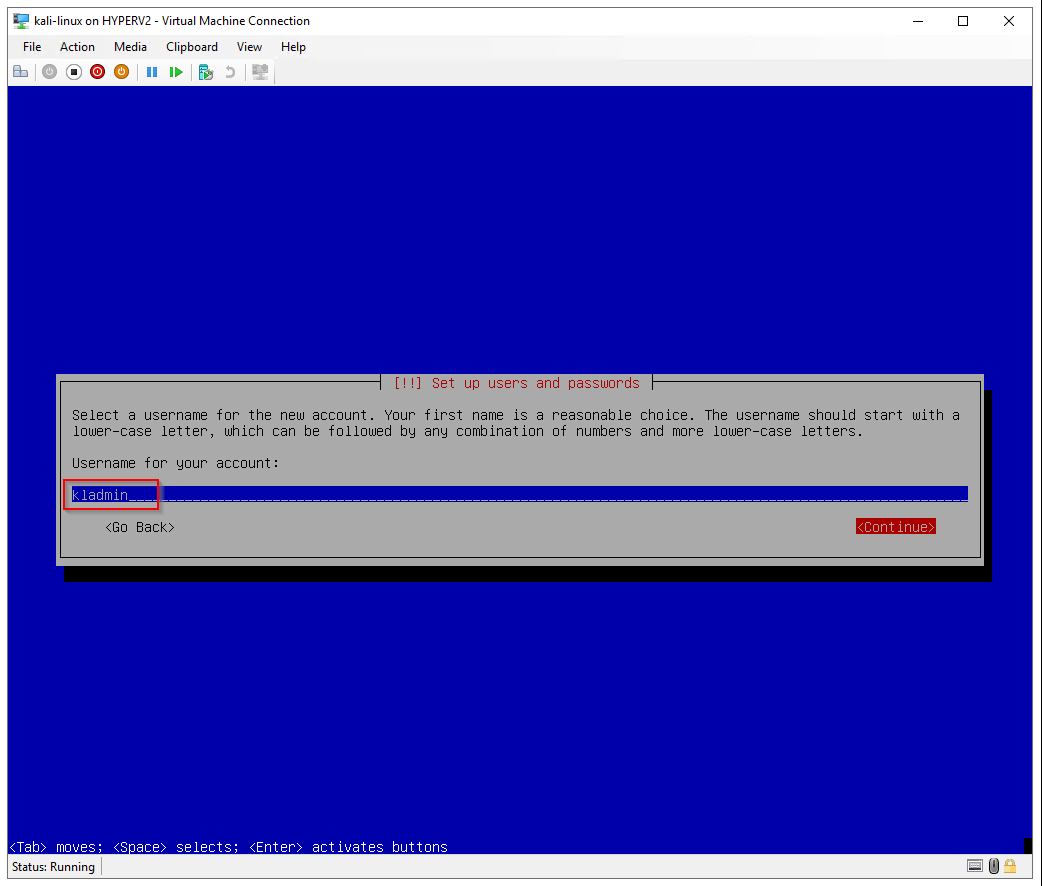
Username for your account: kladmin
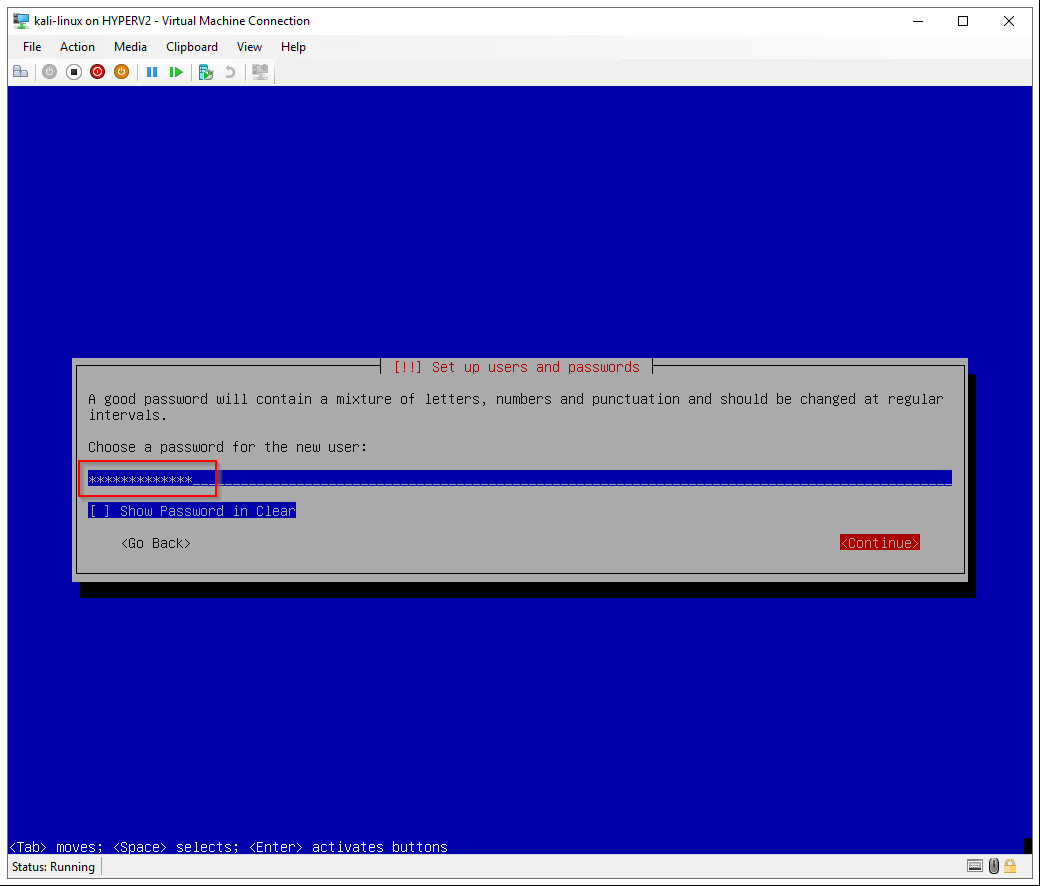
Set a password for the new user
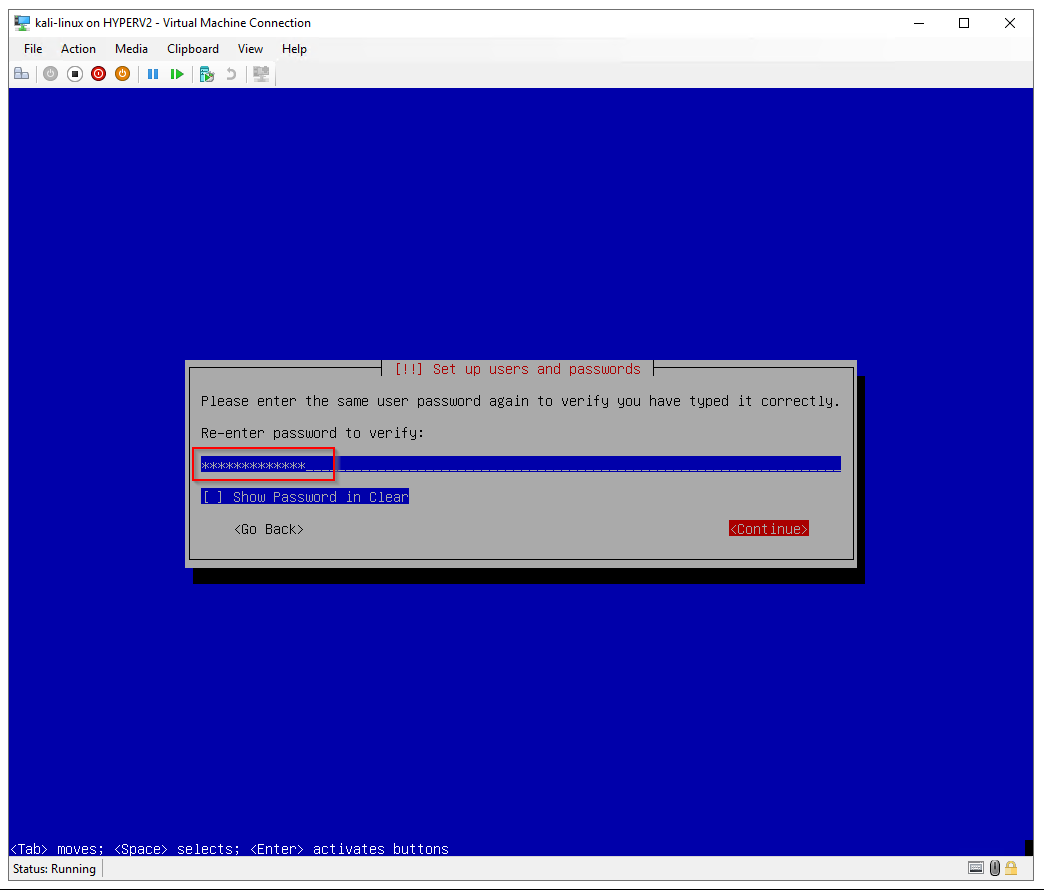
Re-enter the password
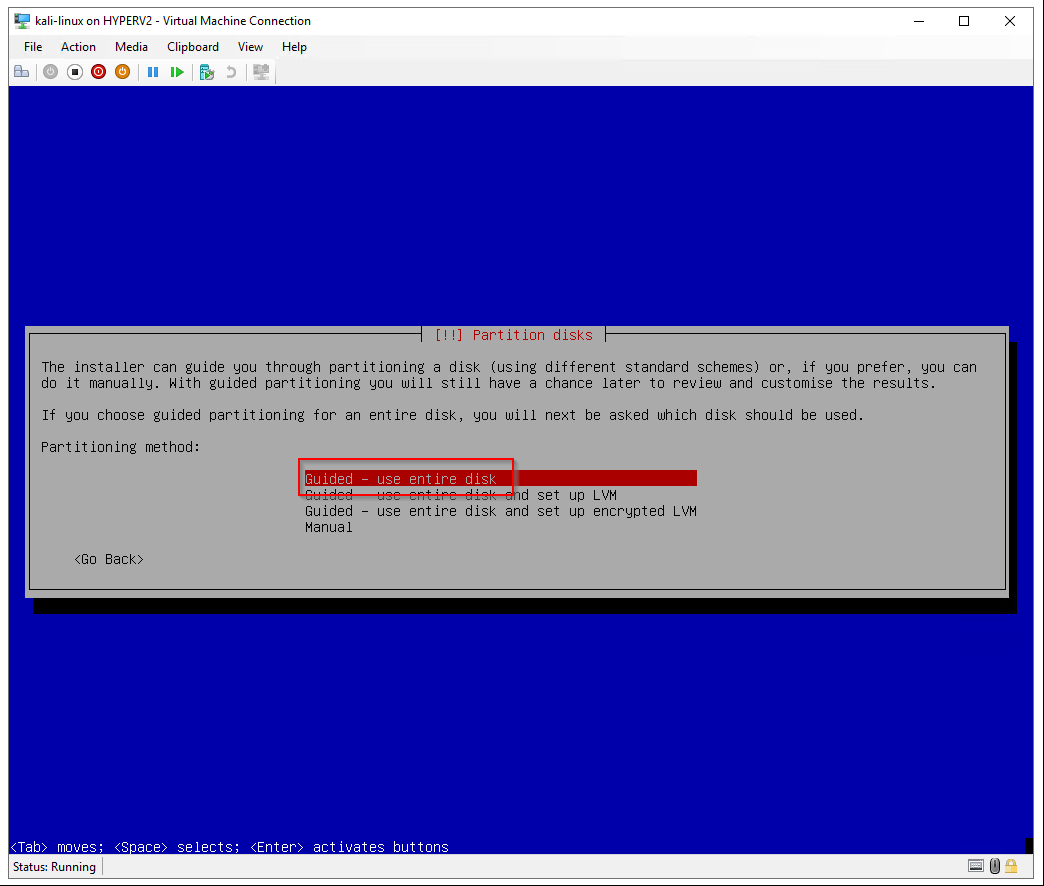
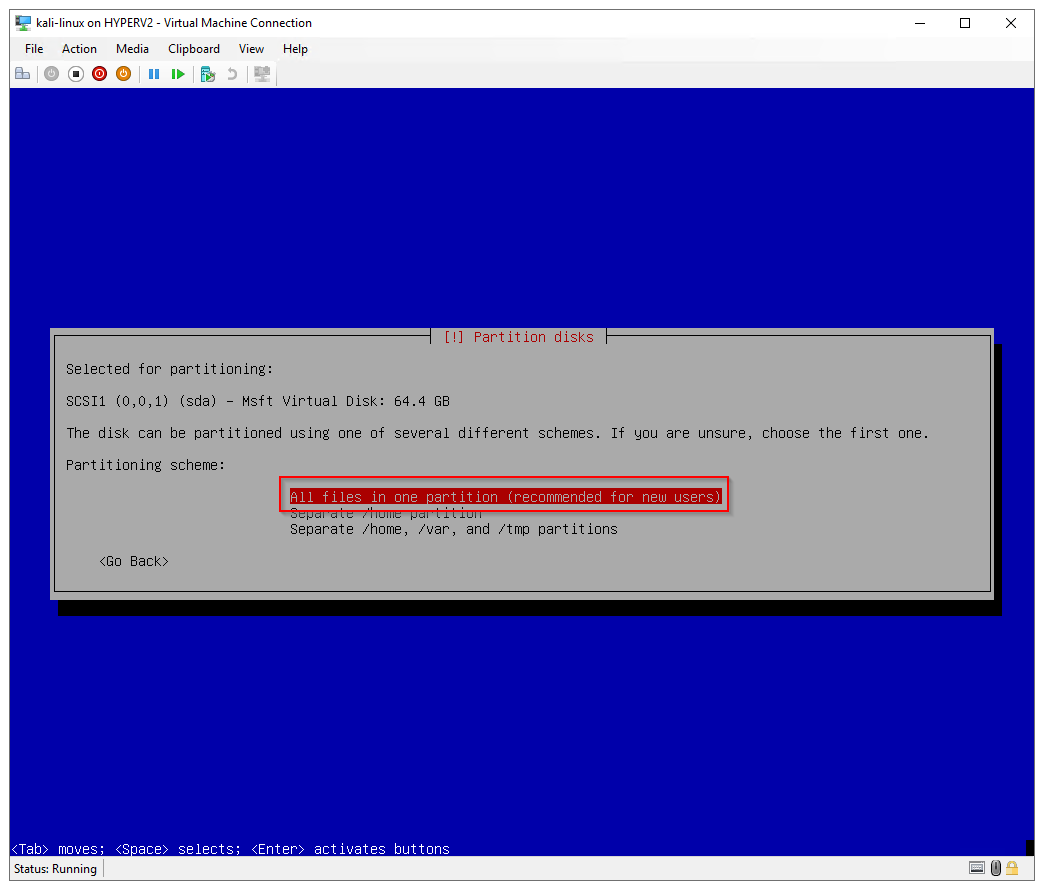
Partitioning method: Guided - use entire disk
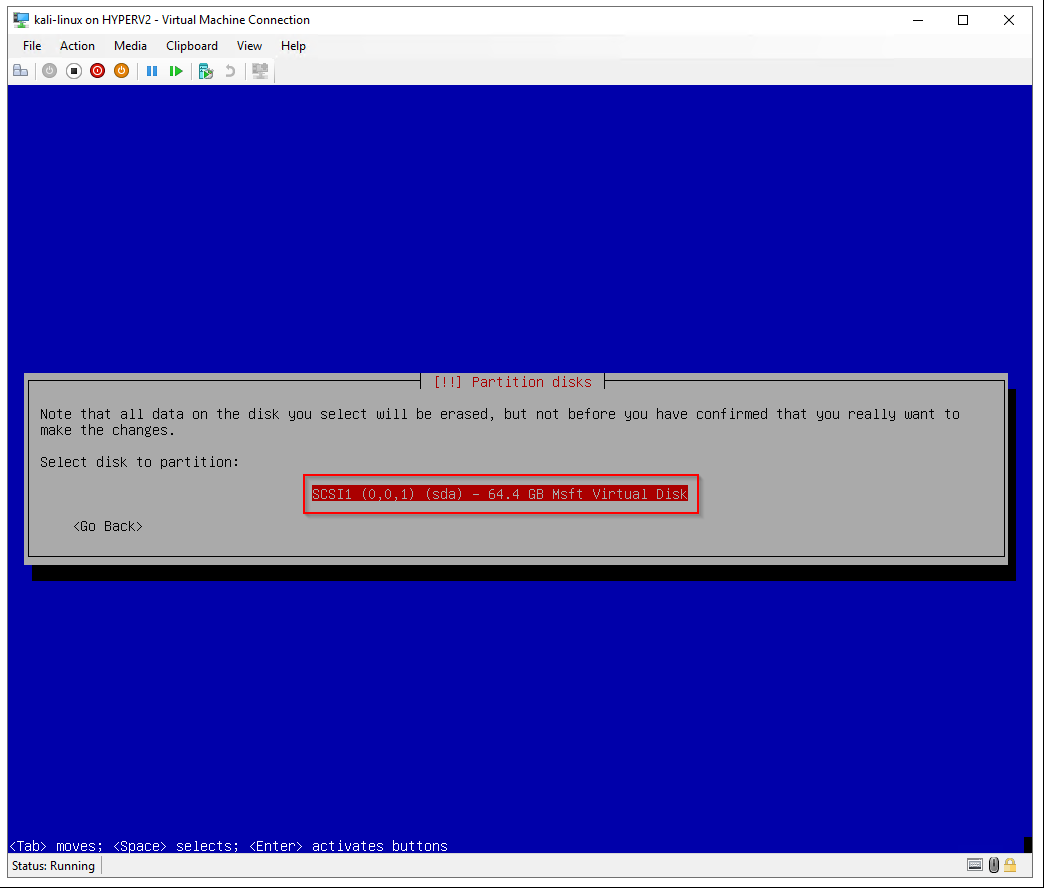
Select disk to partition: Select virtual hard disk
Partitioning scheme: All files in one partition
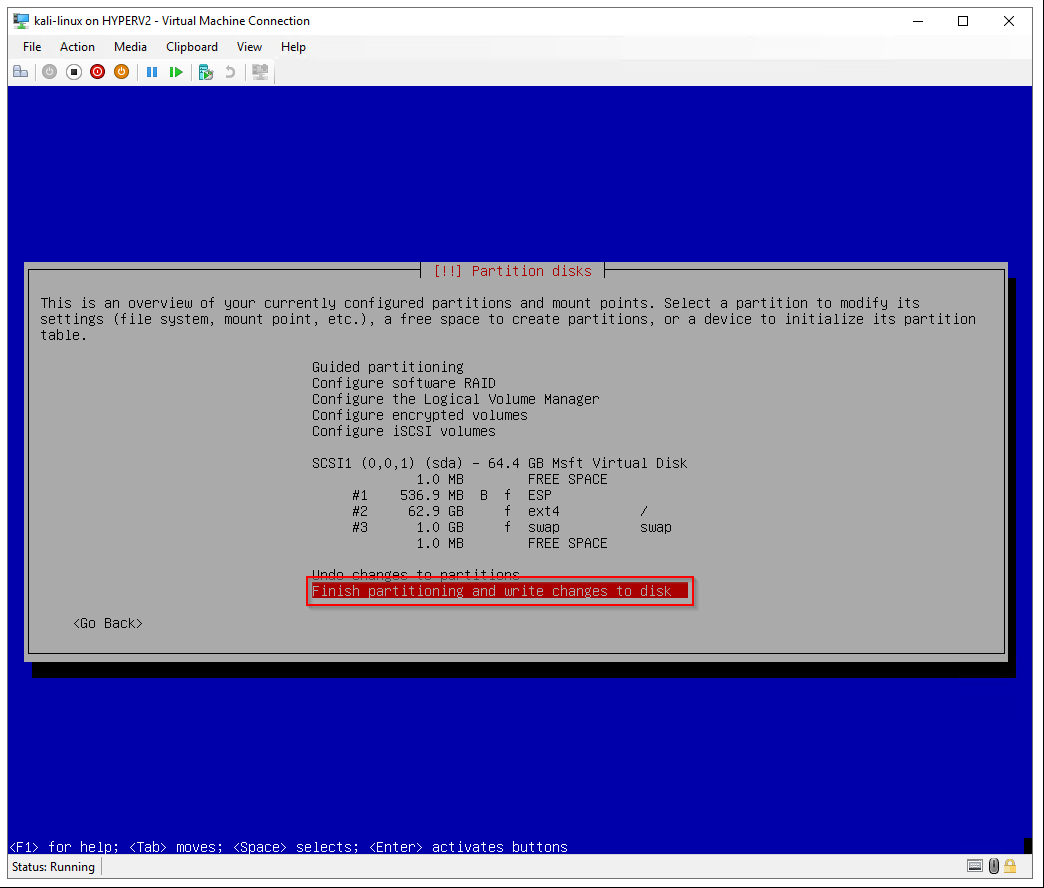
Finish partitioning and write changes to disk
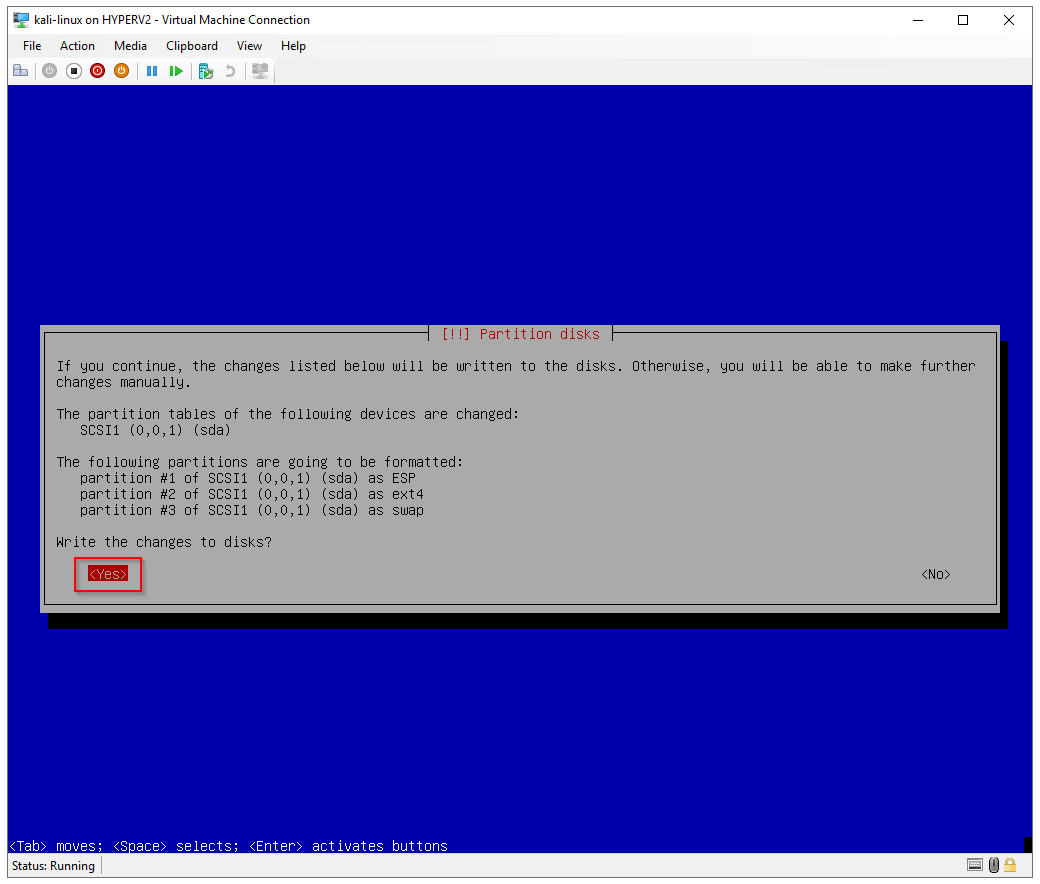
Write the changes to disks? Yes
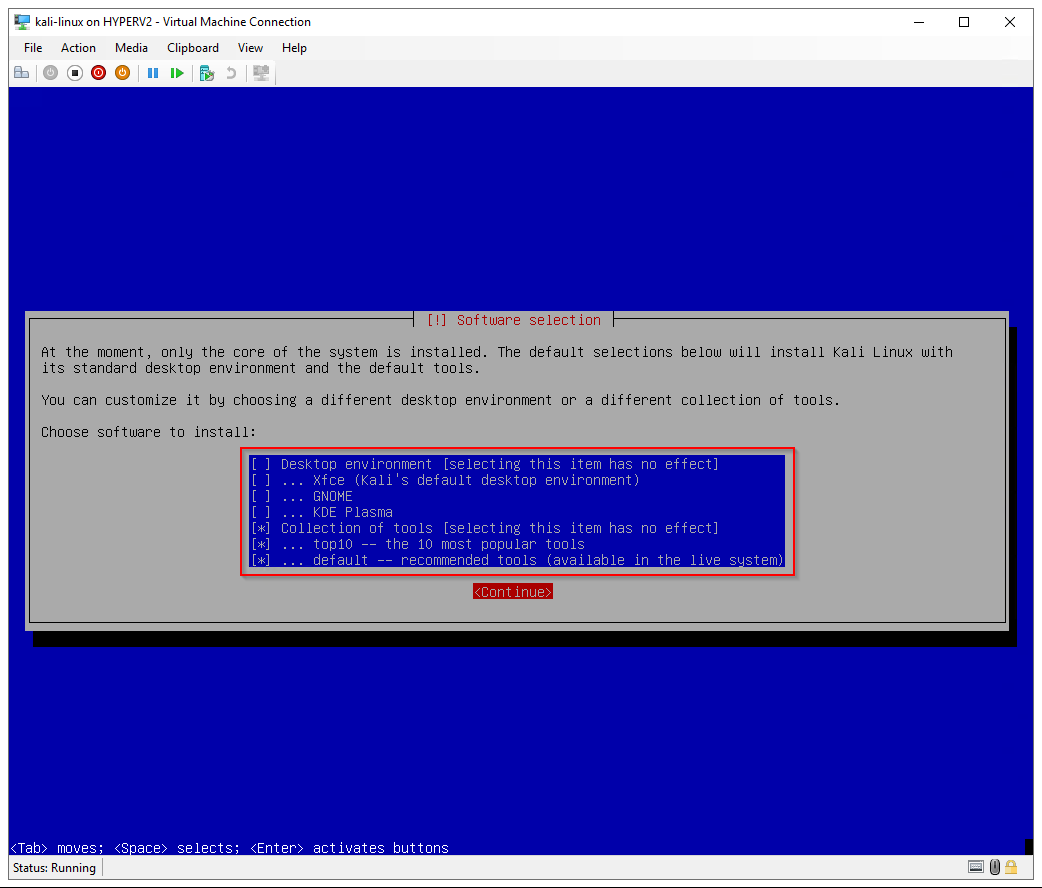
Software selection: Unselect the desktop environments to install Kali without a GUI
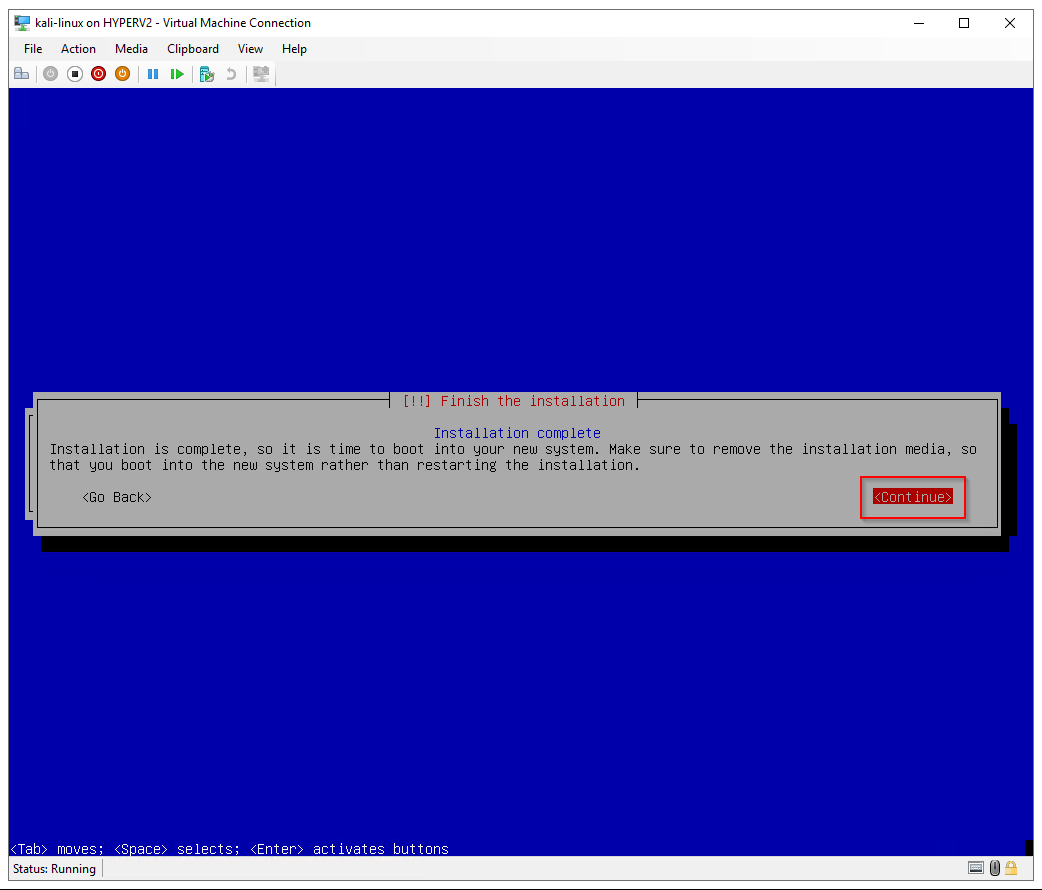
Installing Kali Linux
by Author
https://www.kali.org/docs/installation/hard-disk-install
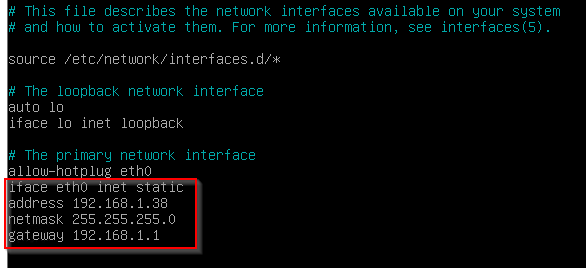
# set a static ip addresssudo nano /etc/network/interfaces
# The primary network interface
allow-hotplug eth0
iface eth0 inet static
address 192.168.1.38
netmask 255.255.255.0
gateway 192.168.1.1
# restart networkingsudo /etc/init.d/networking restart
# Show the current network configurationip address show
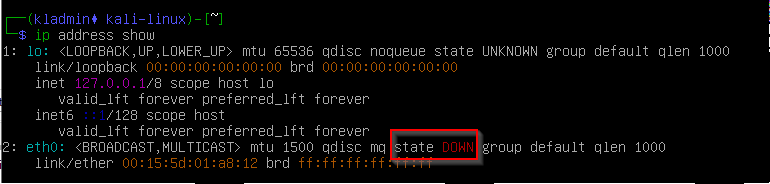
# change the state of network interface to upsudo ifup eth0
# Show the current network configurationip address show

7. Install updates
Configure updates (optional)
# edit apt sources.list
sudo nano /etc/apt/sources.list
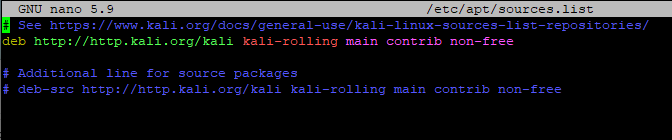
# update package lists and install updatessudo apt-get update && apt-get upgrade
Kali Network Repositories (/etc/apt/sources.list)
by Author
https://www.kali.org/docs/general-use/kali-linux-sources-list-repositories
8. Install SSH server
Check if Open SSH server is installed
# list installed packagesapt list openssh-server

If ssh is not installed, you can install it using this command
# install open ssh serversudo apt-get install openssh-server
# enable ssh service to start at bootsudo systemctl enable ssh.service
# start ssh servicesudo systemctl start ssh.service
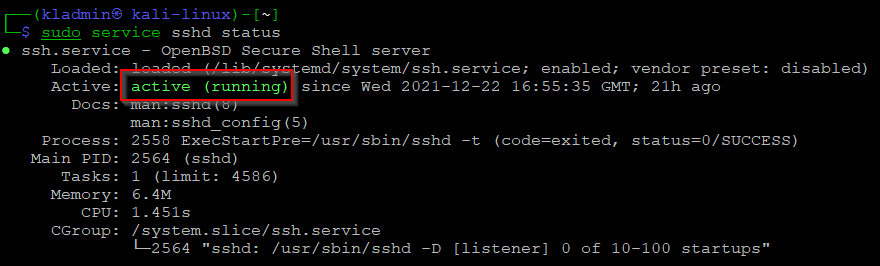
# check status of ssh serversudo service sshd status
9. Configure two-factor authentication (2FA) for SSH
In the next steps, we will enable SSH, install and configure Google authenticator and configure two-factor Authentication for SSH.
# install Google authenticator PAM modulesudo apt install libpam-google-authenticator -y
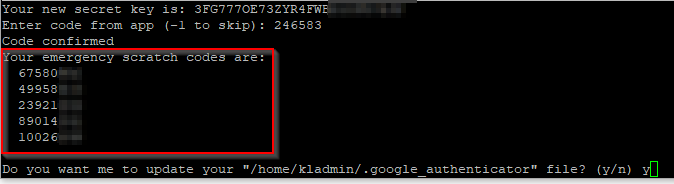
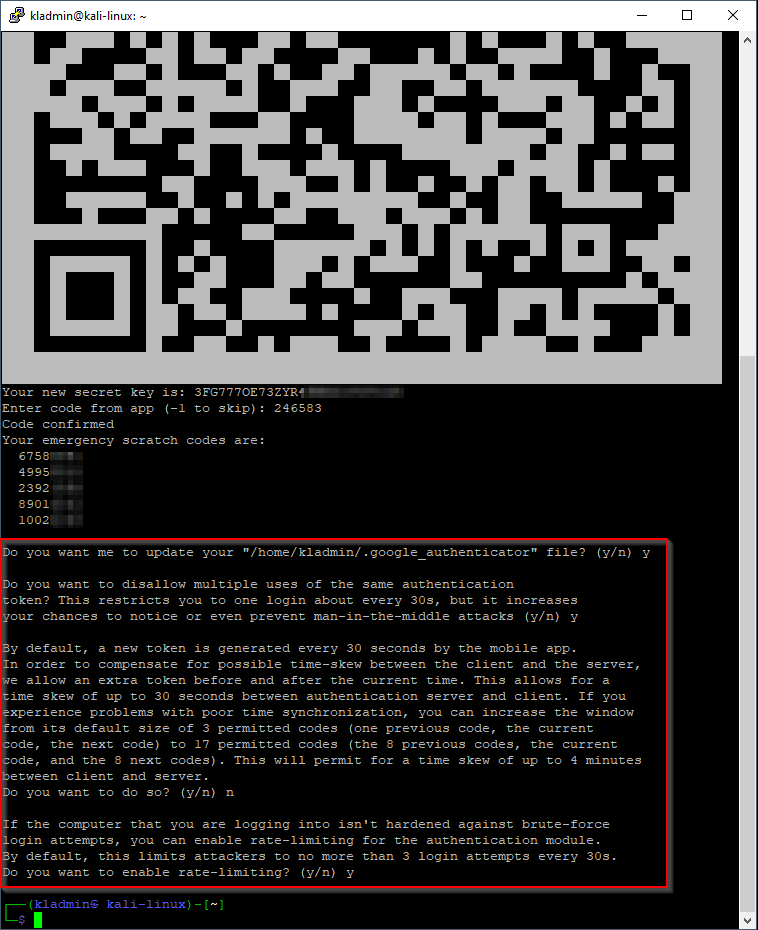
# configure Google authenticatorgoogle-authenticator
Do you want authentication tokens to be time-based y
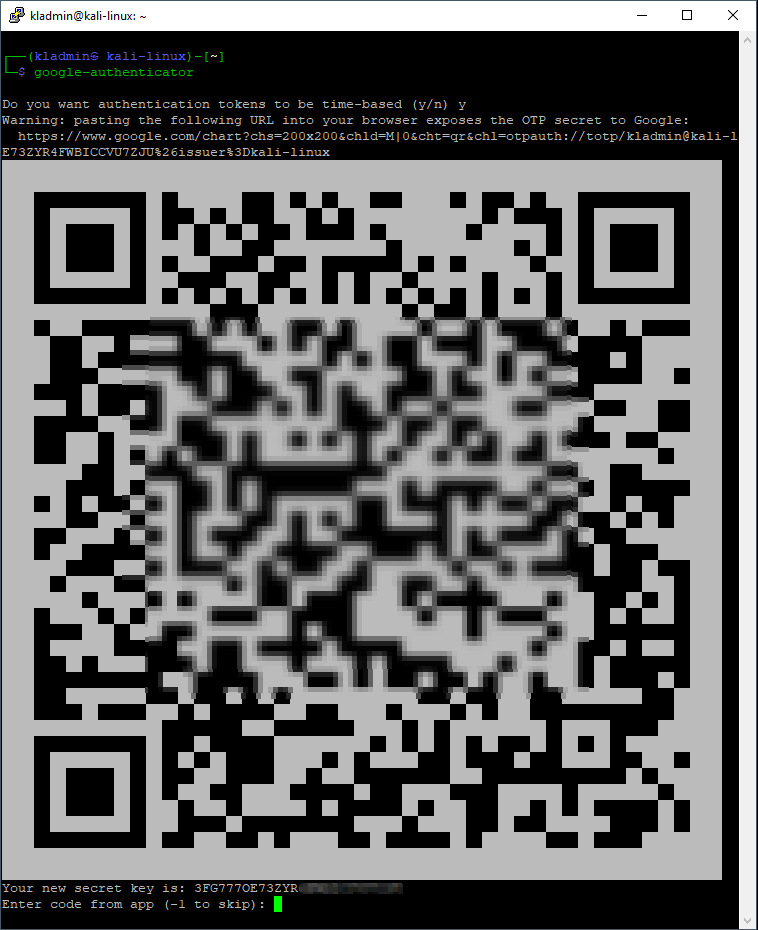
Open the Google authenticator app on your phone
Tap add - scan a barcode and scan the QR code from Kali
Then enter the code from the authenticator mobile app in the Kali console to complete the two-factor setup
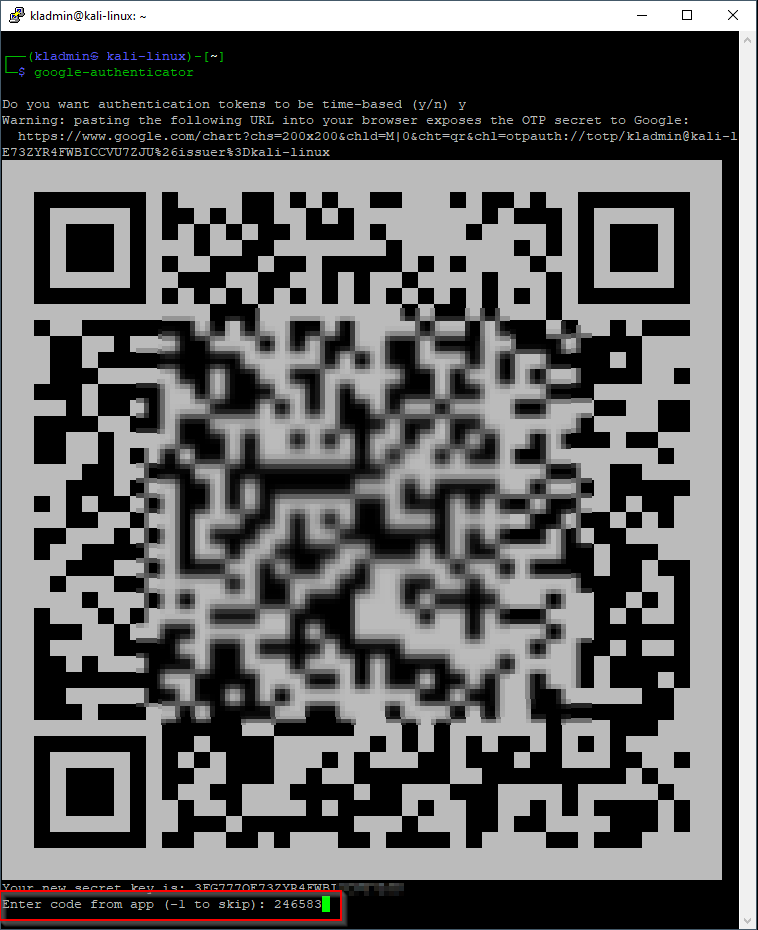
After two-factor has been set up, a list of emergency scratch codes will be displayed. These can be used to sign in if you lose your phone or can't use Google authenticator
Configure SSH to use Google authenticator
# edit the pam config for sshsudo nano /etc/pam.d/sshd
Add this to the end of the file
# allow password authentication and Google authenticator
auth required pam_unix.so no_warn try_first_pass
auth required pam_google_authenticator.so
# edit the ssh server configsudo nano /etc/ssh/sshd_config
Change these options in the file
# allow root login
PermitRootLogin yes

# Change to yes to enable challenge-response passwords (beware issues with
# some PAM modules and threads)
KbdInteractiveAuthentication yes
Add this line to the end of the file
# allow password authentication
AuthenticationMethods keyboard-interactive
# restart sshsudo /etc/init.d/ssh restart
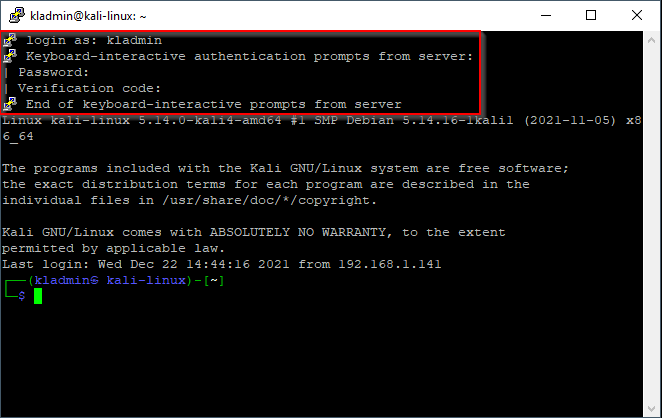
To test the SSH two-factor settings, open another SSH session to Kali.
You will get prompted for your username, password, and two-factor verification code from Google authenticator

Comments