You can help support this website by buying me a coffee!

Fix Acer Aspire 5 laptop hard disk not visible by injecting Intel storage drivers into the Windows boot image and manually loading the drivers during Windows setup.
Problem: Acer Aspire 5 laptop hard drive not detected during Windows 11 installation
The SSD is not detected and Windows setup you will ask you to load a media driver

To fix this problem, we'll need to download the Intel storage drivers and add them to the Windows installer boot image boot.wim so they are available during Windows 11 setup.
https://www.acer.com/us-en/support/drivers-and-manuals
Extract the download driver.zip file

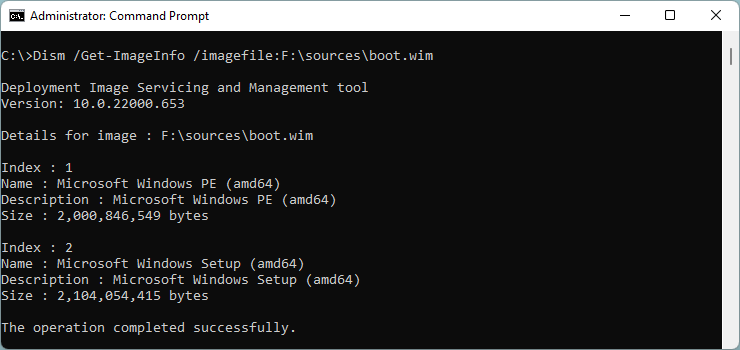
Before we can modify the Windows boot image, we need to find the index number using DISM.exe
F: is the drive letter on the Windows 11 installation USB driveDism /Get-ImageInfo /imagefile:F:\sources\boot.wim
In this example, Windows Setup is Index number 2
F: drive is Windows installer USB drive
Create directory C:\Mountmkdir C:\Mount
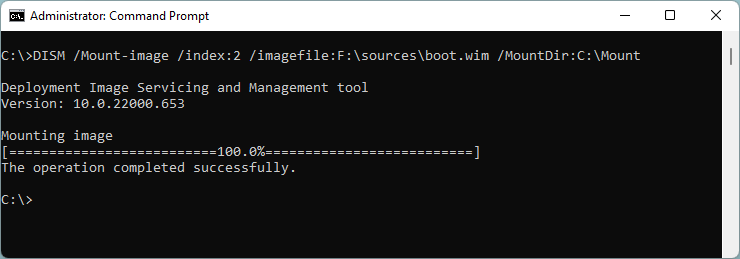
Mount boot.wim imageDISM /Mount-image /index:2 /imagefile:F:\sources\boot.wim /MountDir:C:\Mount
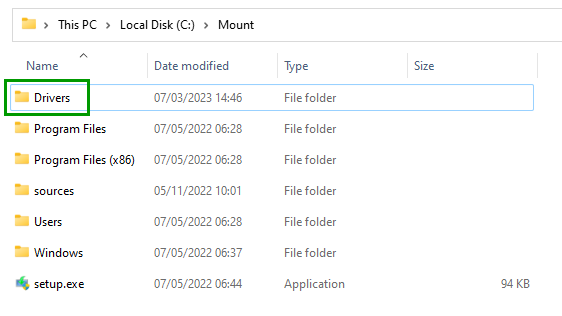
Create folder in the mounted directory C:\Mount\Drivers
Copy the contents of the IRST driver folder to C:\Mount\Drivers
When you unmount the image, you must specify either /Commit to write changes to the image or /Discard to not save any changes.
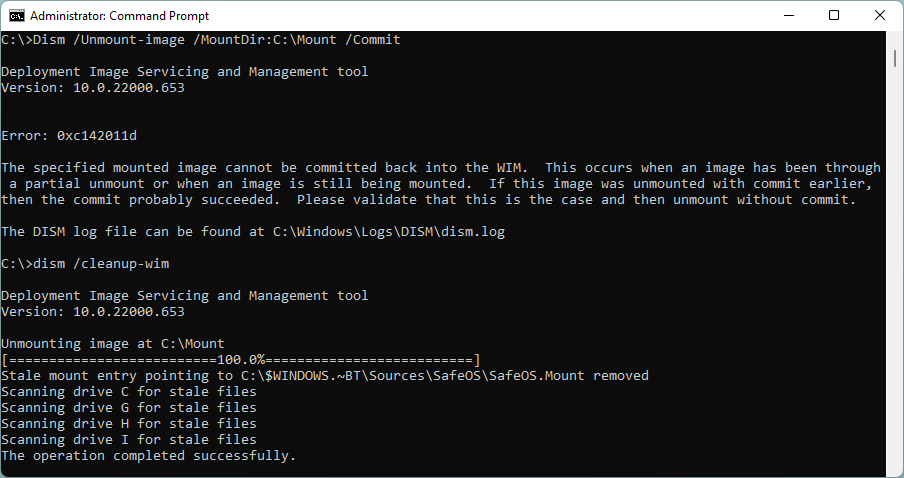
# Unmount image and save changesDism /Unmount-image /MountDir:C:\Mount /Commit
# Unmount image, dont save changesDism /Unmount-image /MountDir:C:\Mount /Discard
Error: 0xc142011d
The specified mounted image cannot be committed back into the WIM. This occurs when an image has been through a partial unmount or when an image is still being mounted. If this image was unmounted with commit earlier, then the commit probably succeeded. Please validate that this is the case and then unmount without commit.
The DISM log file can be found at C:\Windows\Logs\DISM\dism.log
If you get the above error when unmounting the image, try running DISM again with the /cleanup-wim optionDISM /cleanup-wim
Now we've injected the Intel storage drivers into the Windows boot image we can try installing Windows 11 again
Boot from USB and start Windows 11 setup
Load driver

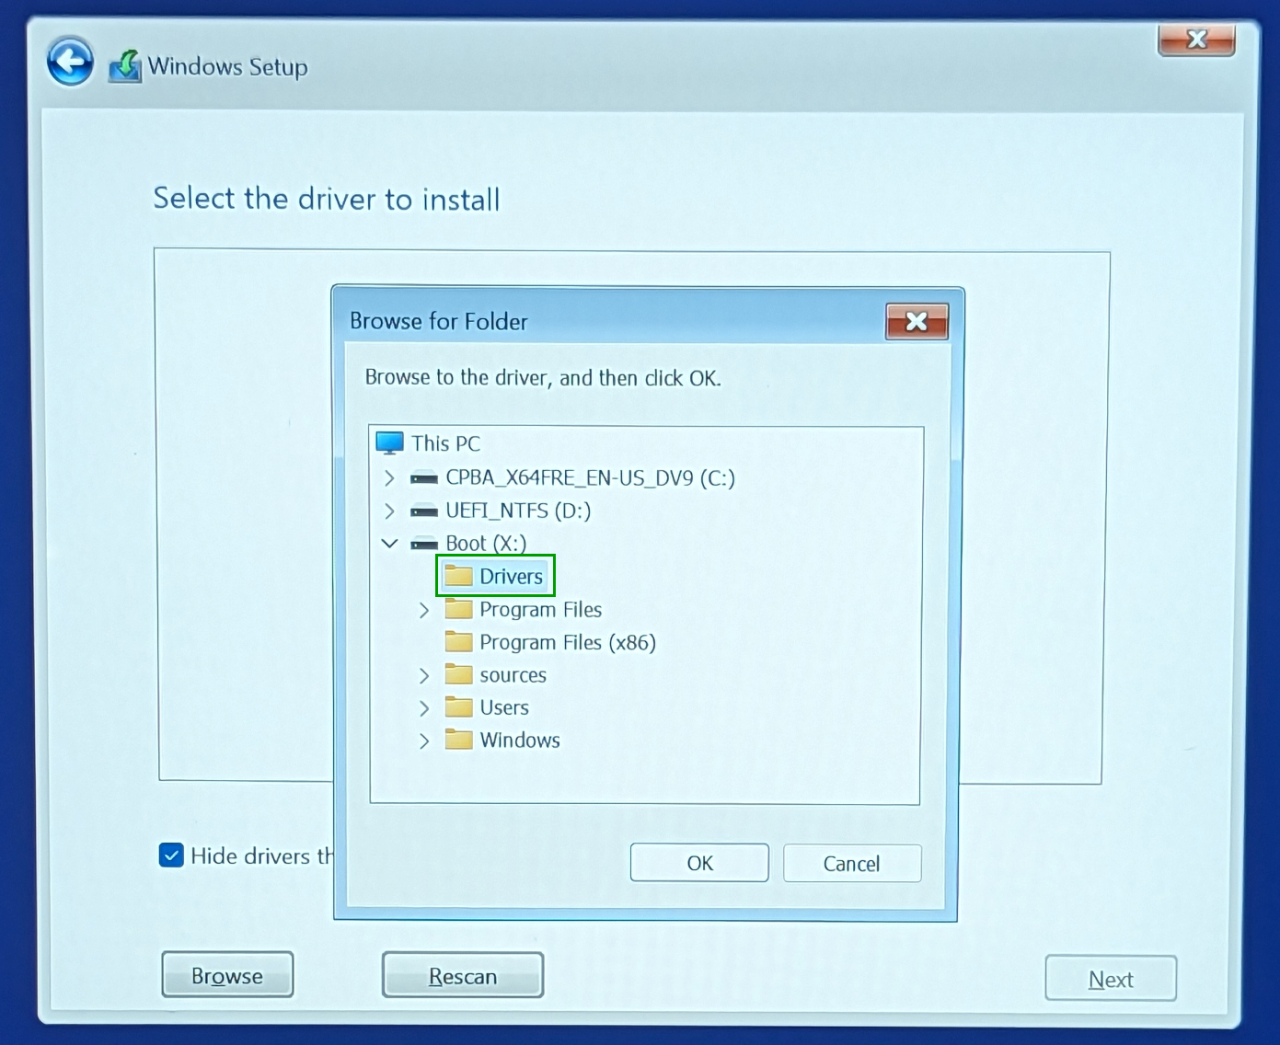
Click browse

Select the Drivers folder
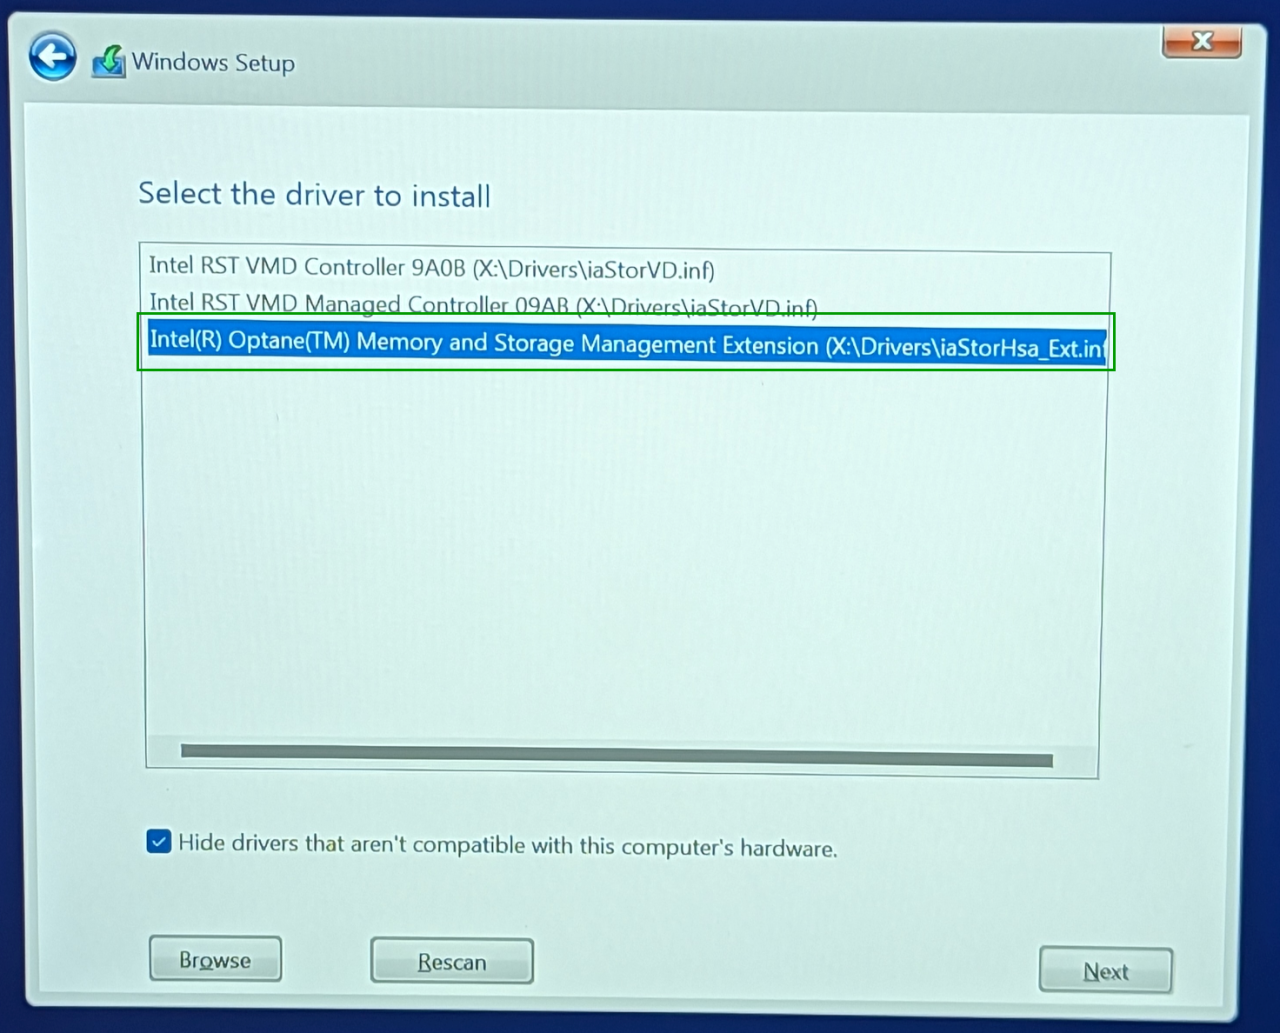
Select the Intel Optane Memory and Storage Management Extension iaStorHsa_Ext.inf and click next to load the driver
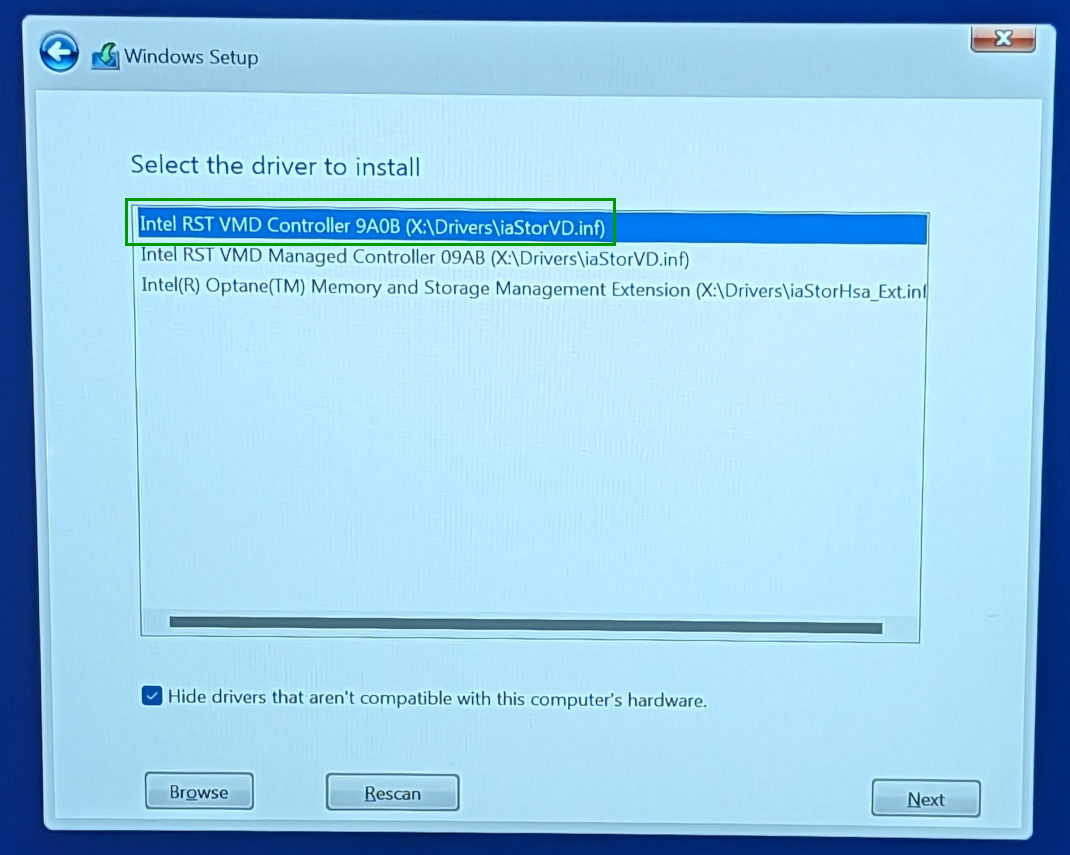
Repeat the steps to load the Intel RST VMD Controller 9A0B driver iaStorVD.inf

References:
by Author
Take Inventory of an Image or Component Using DISM
https://learn.microsoft.com/en-us/windows-hardware/manufacture/desktop/take-inventory-of-an-image-or-component-using-dism
Modify a Windows image using DISM
https://learn.microsoft.com/en-us/windows-hardware/manufacture/desktop/mount-and-modify-a-windows-image-using-dism
Comments